Getting started
When the app is started for the first time in your browser, there is an option to type in your name and then to follow a brief tour that shows you the main items on the web page. If you don't enter your name, one is created for you (a sea creature), so that you can remain anonymous.
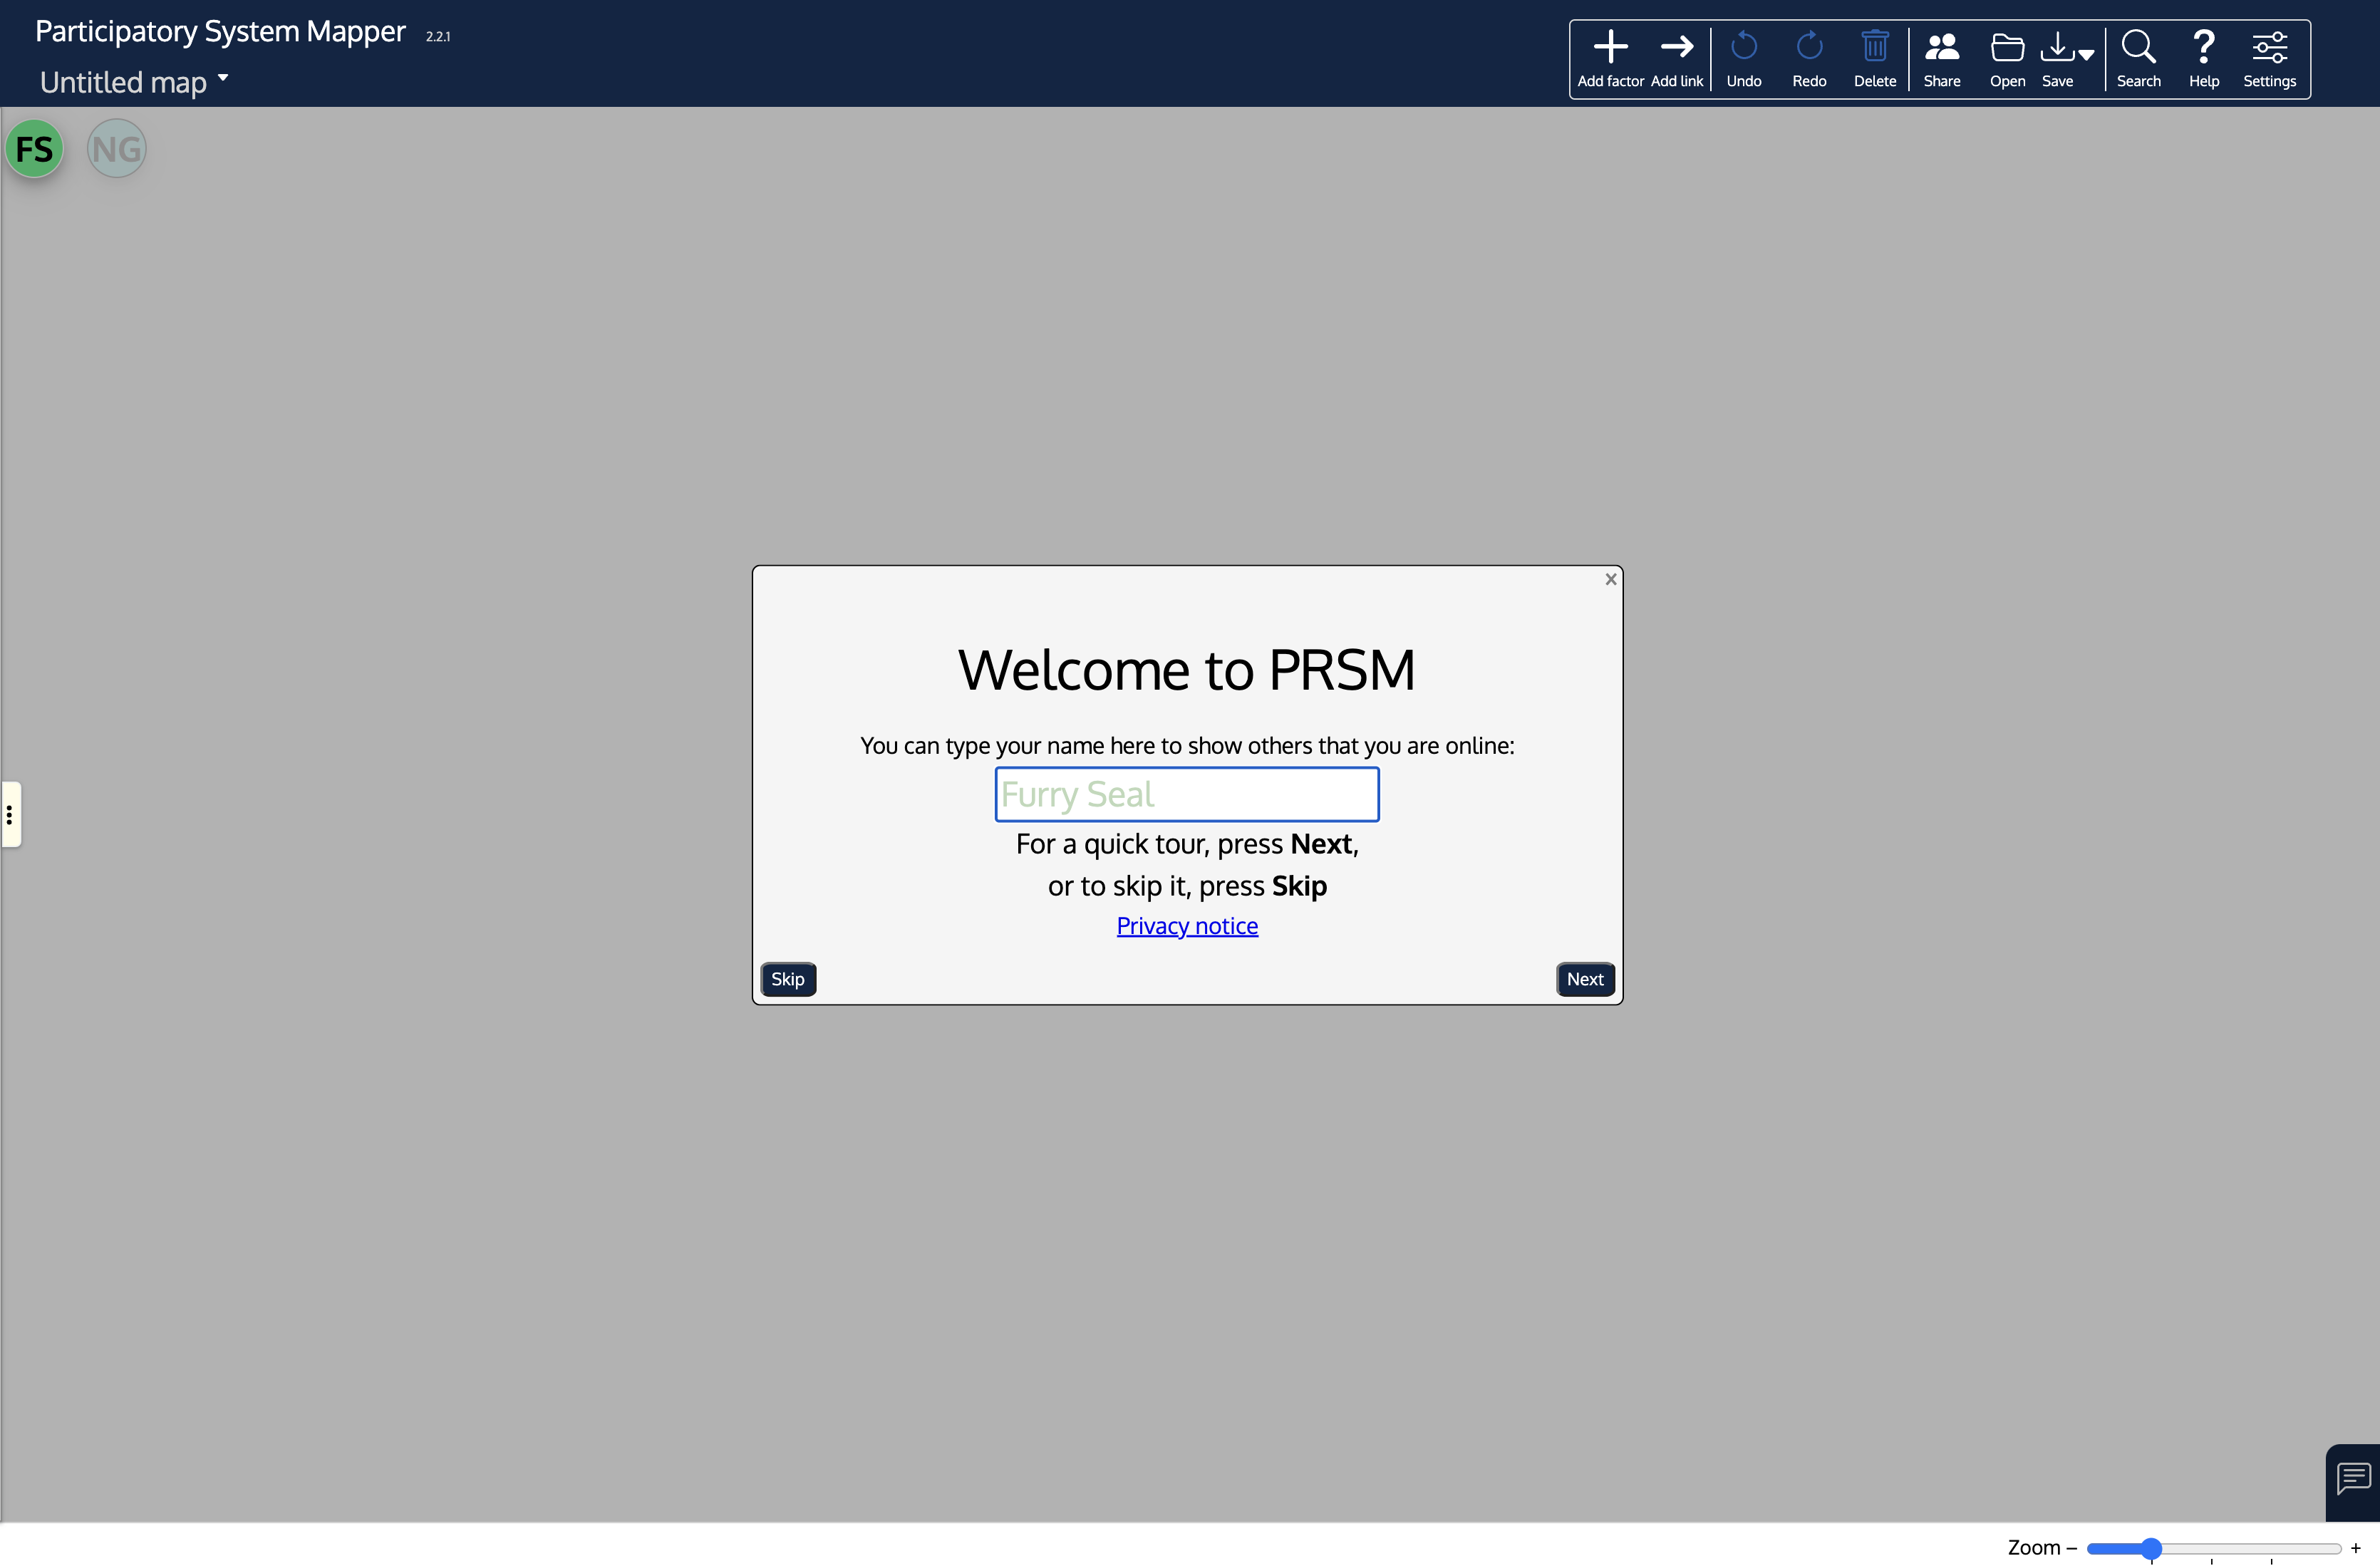
This introductory tour is only shown the very first time you use PRSM. If you want to view the tour again, click to reset the tutorial.
Buttons
At the top of the window are a row of buttons.

This what they do, from left to right:
- New factor (or node). Click on the cross and then click somewhere on the blank area below (the 'network pane') to create a node for the network. A small dialog box will open for you to type in a label for the factor.
- New link (or edge). Click on the arrow button and then drag from one factor to another to link them. If you wish, you can have two links between a pair of factors: one for each direction.
- Undo Reverses the last action (e.g. if you have just created a new factor, it will be removed). See also using rollback from the History window, described in the section about the Network Tab.
- Redo Redo the last action (e.g. if you have just undone the creation of a factor, this will return the factor to the network).
- Bin First, select a factor or a link by clicking on it. Note that the selected factor or link gains a shadow and is listed in the status bar at the bottom of the window. Then click on the Bin button (or press the backspace or delete keys) - the factor or link is deleted. The Undo button will restore it if you deleted it by mistake.
- Share Shows a dialog box with a web link that you can copy and send to someone else. If they then access that link, they will see your network and can edit and add to it. See Sharing below.
- Open file Read in a file containing a network from your computer drive. See [below](#reading-and-importing maps) for supported file formats. The content of the file replaces the network in the browser.
- Save file Save the network in a file on your computer. The file is saved in the app's own format, or if you click on the small triangle next to the button, you can choose to save an image of the map as a high resolution image (a .PNG file), or the map data in GML (Graph Markup Language) or CSV (Comma Separated Values) formats.
- Search Search for factors by name.
- Help Display this help page in a separate window.
- Settings Opens a panel that allows much more customisation and exploration of the network (see Styling the map and Analysing the map below).
To select a factor or a link, click on it. To select more than one, click on one factor or link and then hold down the pointer on the other. Or you can hold down the control (CTRL) key and click to add to the selection. At the bottom of the window is the status bar that will show which factors and links have been selected. Clicking anywhere on the background will deselect all the factors and links.
Each factor can be moved across the network pane by dragging it. The whole network can be moved by dragging the background.
Also at the bottom of the window on the right is a slider that will adjust the magnification: slide to the right to make the factors and links larger and to the left to make them smaller (or click on the + and - signs). On a tablet, trackpad or phone, you can zoom by using the 'pinch' gesture.
To return the network to a size that will fit neatly in the window, double click on the black bar at the top, or anywhere on the network background (the latter will also deselect any selected factors or links).
At the top left, you can enter a title for the map. Click on 'Untitled map' and type in your title. If you have created or used several maps (and they have titles), a small downward triangle will appear to the right of the title. Clicking on this shows a list of those previous maps, and clicking on one of those takes you away from the current map and loads the previous one (after you have confirmed that this is what you want to do).
Holding down the Shift key and then moving the mouse pointer will show a magnifying glass with an enlarged view of the part of the map under the pointer. You need to be using a keyboard for this.
Notes
If you select just one factor or one link, a small panel appears. This shows the factor or link label (if it has one), the time and date when the factor or link was created, when it was last modifed if it has been changed since it was created, some network statistics about the factor, and an area where you can type a note to show further information about the factor or link.
If a factor or link has a note, a small 'card' icon is shown next to it.
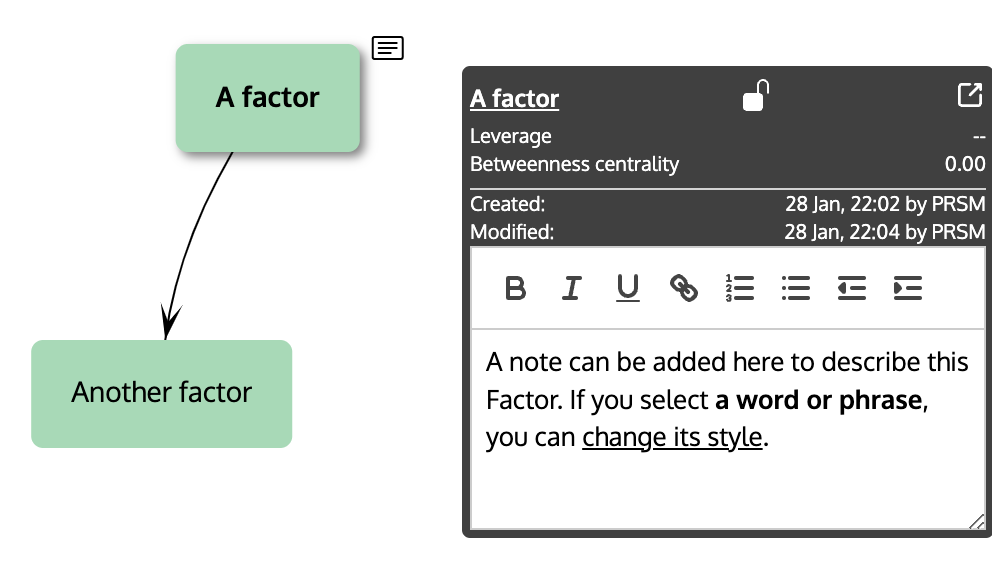
A basic editor is provided for writing the Notes. You can format the text with bold, italic or underline, create bulletted or numbered lists, and add weblinks (URLs) to the text.
Clicking the button ![]() at the top right of the panel will open a new window that also shows the notes for the factor or link. Using this window is easier if you have more than a few words to write. It also provides a more extensive range of editing buttons: you can style the text, insert images into the text, change the font and so on. The small panel version of the notes keeps in sync with the larger window, and the text is saved as you write. When you are finished, click on the map background to deselect the factor or link; this also closes the Note Window.
at the top right of the panel will open a new window that also shows the notes for the factor or link. Using this window is easier if you have more than a few words to write. It also provides a more extensive range of editing buttons: you can style the text, insert images into the text, change the font and so on. The small panel version of the notes keeps in sync with the larger window, and the text is saved as you write. When you are finished, click on the map background to deselect the factor or link; this also closes the Note Window.
For factors, there is also an open or closed padlock symbol ![]() . If this is shown closed, the factor will be locked into place on the network pane and cannot be dragged elsewhere. The factor will have a small padlock symbol at the top left.
. If this is shown closed, the factor will be locked into place on the network pane and cannot be dragged elsewhere. The factor will have a small padlock symbol at the top left.
Locking a factor is useful when you are doing analysis of the map (see the Analysis section) and don't want to lose the selection while investigating other factors.
Overview
On the left edge of the map, half way down, is a small yellow tab with three black dots. Clicking on this opens an overview panel where you can describe the map as a whole and enter notes about it. Click on the tab again to close the panel.
Sharing
If you use https://prsm.uk/prsm.html to start the app, a new room is created for you. When you click on the share icon, a dialog box is shown that includes the name of the room in the link that is displayed:
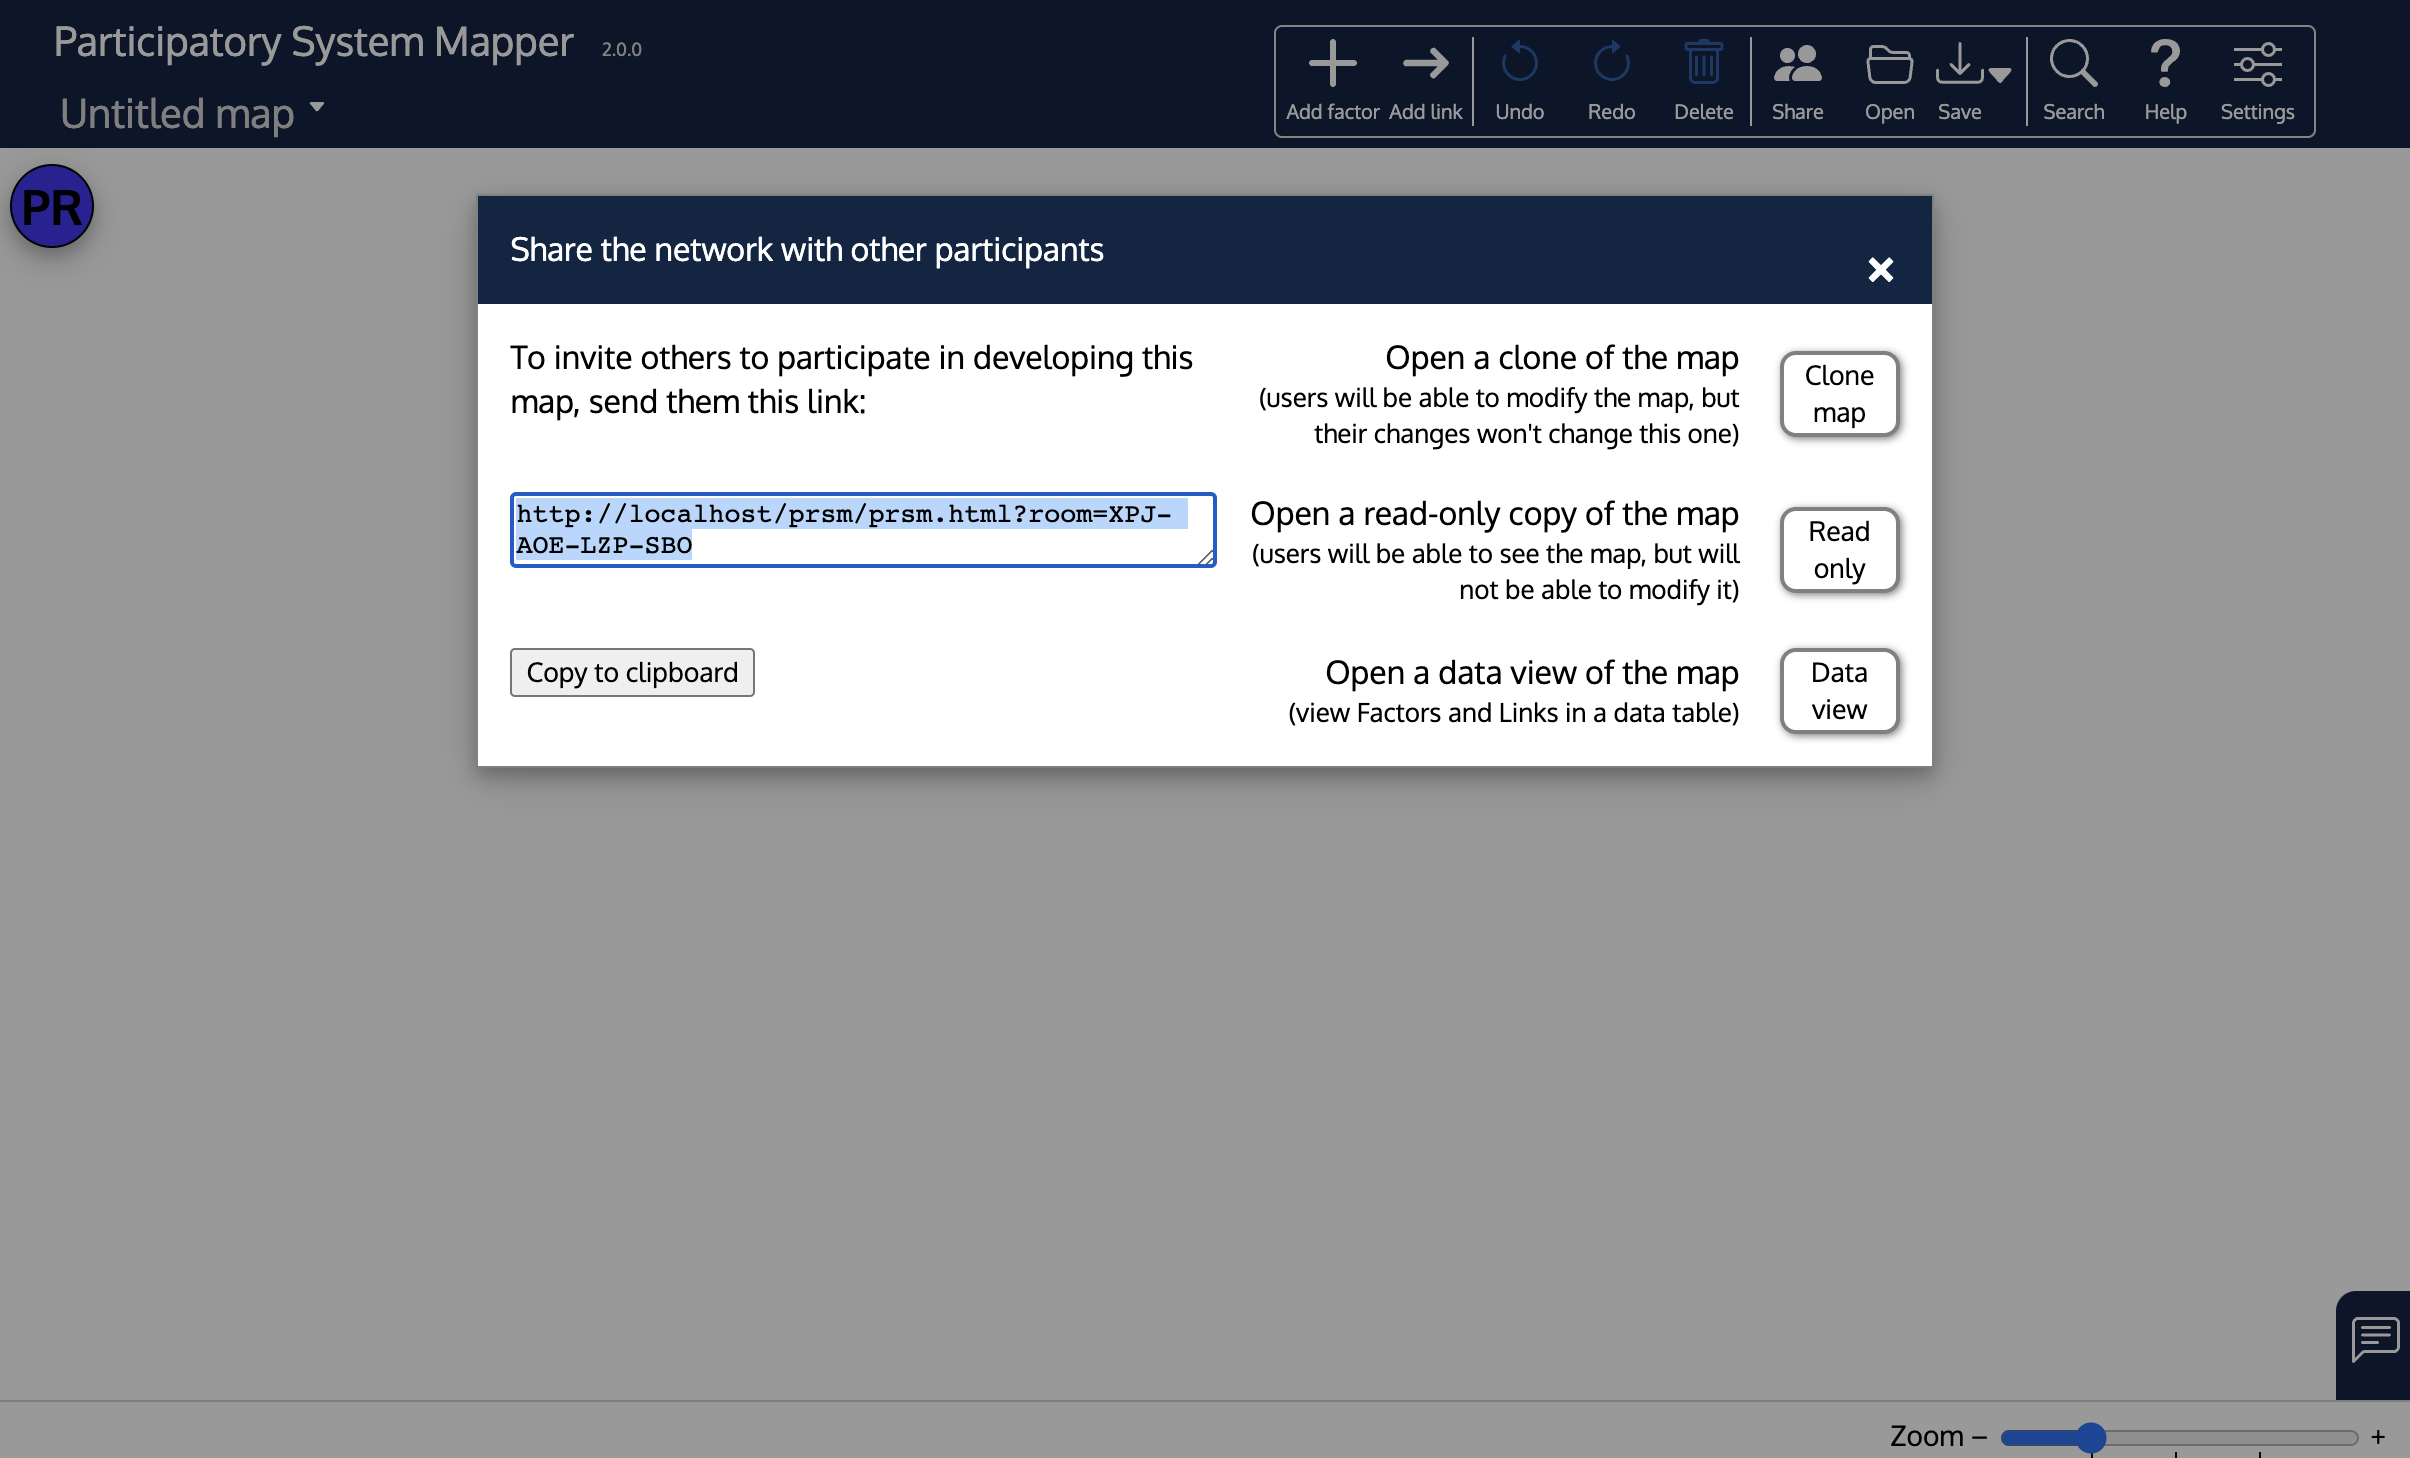
Click the 'Copy to clipboard' button to copy the web link to the clipboard, and then paste the link into an email or a text message or just tell other participants the name of the room (which is a randomly generated set of 4 groups of three letters separated by hyphens). When they access the link, they will see whatever is in your app window.
There are also three buttons on the right. If you click the Clone map button, a browser tab will open with the same map but in a new room - any changes made to this new map will not appear in the original room. You can then send the web address to others, confident that they will not disturb the original map. If you click the Read only button, a copy of the map will be made in a new browser tab, but without any of the buttons that would allow one to modify the map. You can use the web link of this map to distribute the map to people whom you want to look at the map, but not change it. If you click the Data view button, the web link will be a spreadsheet-like view of the factors and links in the map (see the section on the Data view).
Avatars and pointers
When there are others in the room, the initial letters of their names appear in circles at the top left - their avatars. If you hover the mouse pointer over the circle, their full name is shown (their real name or the name they have been given by the app). If they don't do anything for 15 minutes, the avatar fades and if they close their browser window, it disappears.
The other users' mouse pointers are shown on the map. As you move your mouse pointer (or finger on a touchscreen), a small disc containing your initials moves on every other users' map correspondingly. If you are talking with other users by audio or video link, you can use your mouse to point to things of interest, and the other users can see what you are pointing at.
You can 'follow' the mouse movements of another user by clicking on their avatar. When you do that, if that user moves to another part of the map, your map moves too, following that user's mouse pointer. This can be very helpful if the other user is showing you something on the map. To stop following, just click anywhere on the map.
Copy and paste
You can copy selected factors to the clipboard and then paste them into either the same map (to duplicate them) or into another map in another browser window or tab.
Copy and paste is not available with the Firefox browser.
To copy, first select the factors that you want copied (a long press on the factors). Then hold down the Command ⌘ or CTRL ⌃ key and type C. If you copy more than one factor, all the links that go between the selected factors get copied too.
If you want to copy these factors and links into a new map, open a new tab in your browser, go to https://prsm.uk/prsm.html, click on the map and type ⌘V or ⌃V. Or to duplicate the factors in the same map, just type ⌘V or ⌃V.
Formatting factors and links
Double clicking on a factor or a link will bring up a small dialog that enables you to change the design of the factor or link - its colour, shape, size or the label.
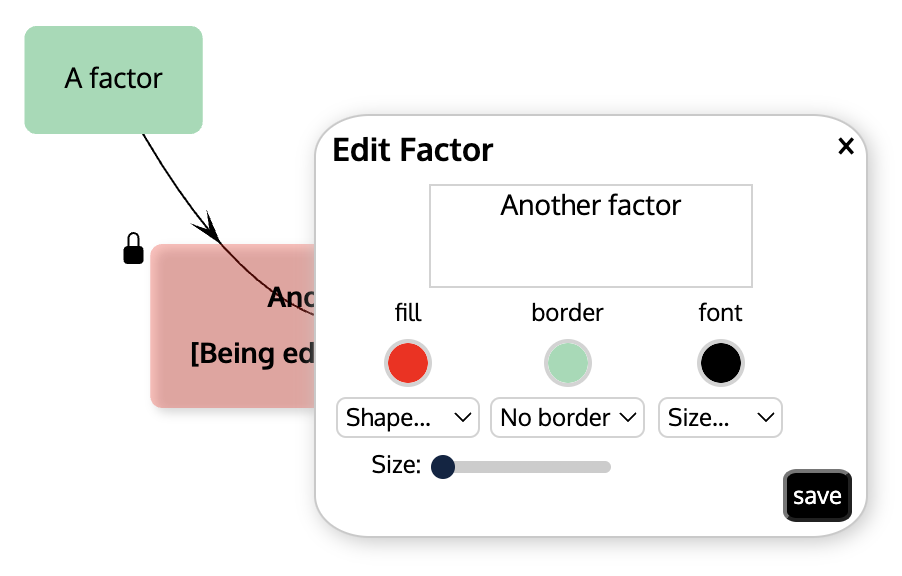
See Styling the map for more on changing the look of factors and links.
The chat window
Clicking on the speech balloon at the bottom right opens up a chat window that you can use to type messages to other participants in your room.
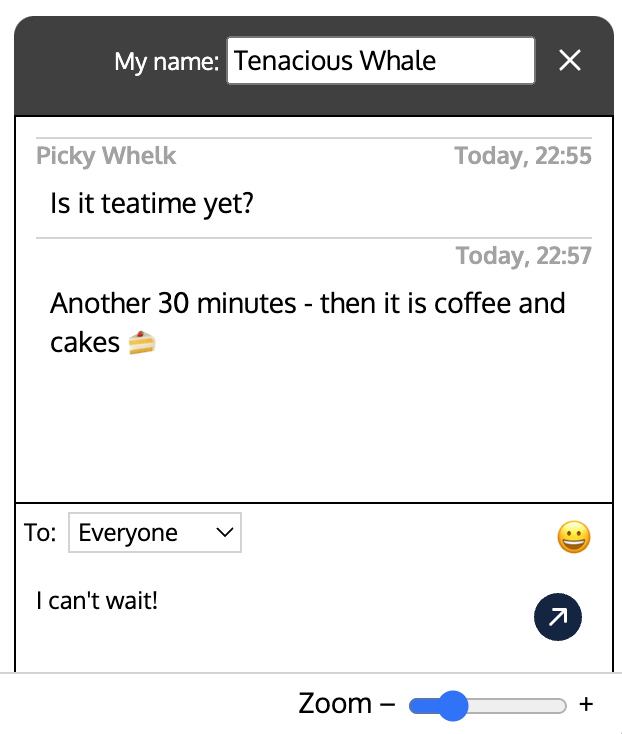
If you didn't provide your real name when you first started using PRSM, the name at the top is randomly generated, but if you click on the name field, you can type in your own.
You can write messages in the box at the bottom and send them by clicking the arrow button. Use the X to close the chat window.
You can choose to send your messages either to everyone or to one selected person (from among those online).
If someone has sent you a message but your chat window is closed, the button will gently pulse to remind you to open it:
The only way to join the room and see the network is by using the randomly generated room name, and the chances of finding that name by trial and error is very, very small. The network data are stored on a central server in encoded form. The server is located in Europe.